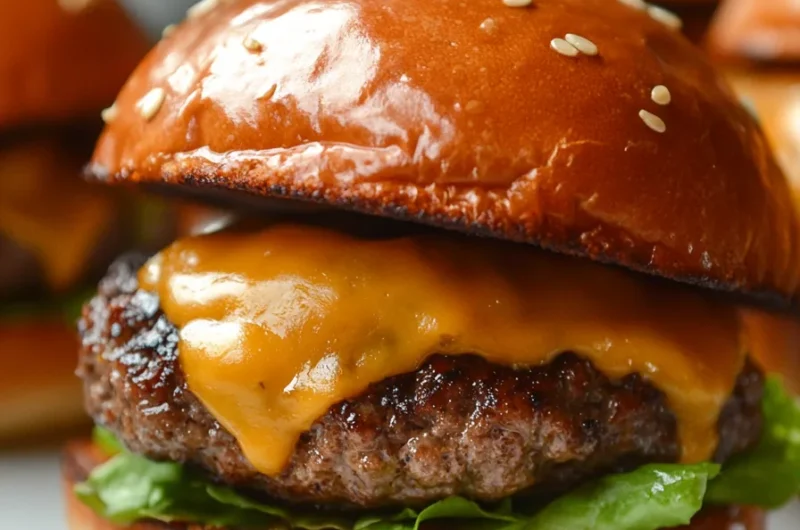
Cheeseburger sliders are a delightful treat that packs amazing flavors into a compact size. Perfect for parties, game days, or casual gatherings, these miniature burgers are a true crowd-pleaser. They offer the classic taste of cheeseburgers but are easier to handle and serve. In fact, their portability makes them an ideal option for anyone looking to enjoy a delicious bite without the fuss of traditional burgers. The blend of juicy beef, melted cheese, and fresh toppings wrapped in soft, fluffy slider buns is simply irresistible.
If you’ve never experienced the joy of cheeseburger sliders, you are in for a delicious surprise. These bite-sized meals are bursting with flavor and offer the same satisfaction as a full-sized cheeseburger. They can be customized to suit a range of tastes, from classic cheeseburgers to gourmet variations. The versatility of cheeseburger sliders is one of the many reasons they have become a popular choice among food enthusiasts and home cooks alike. In this article, you will discover the reasons to love this recipe, how to prepare your sliders, and tips for serving them perfectly. Get ready to wow your family and friends with these incredible cheeseburger sliders!
Why You’ll Love This Recipe
Cheeseburger sliders are not just a meal; they’re an experience that brings people together. You’ll find plenty of reasons to love making and serving these sliders, including:
1. Easy-to-Make: The recipe is simple and straightforward, requiring minimal preparation and cooking skills.
2. Quick Cooking Time: These sliders cook quickly, making them perfect for last-minute gatherings.
3. Customizable: Add your favorite toppings like lettuce, tomato, pickles, or even bacon to fit everyone’s preferences.
4. Perfect for Sharing: The small size makes them easy to share, ideal for parties or family gatherings.
5. Kid-Friendly: Children and adults alike love sliders, making them a hit at family events.
6. Flavorful Ingredients: Each slider is filled with bold flavors that capture the essence of a classic cheeseburger.
With all these elements combined, you’ll see why cheeseburger sliders are not just a meal, but a go-to recipe for any occasion!
Preparation and Cooking Time
When it comes to cheeseburger sliders, the preparation and cooking time is quite efficient. Here’s a breakdown of what to expect:
– Preparation Time: 15 minutes
– Cooking Time: 25 minutes
– Total Time: 40 minutes
These times can vary based on your cooking experience and the equipment you use, but generally, you can whip up a batch of delicious sliders in no time.
Ingredients
– 1 pound ground beef (80/20)
– 1 teaspoon salt
– ½ teaspoon black pepper
– 1 tablespoon Worcestershire sauce
– 12 small slider buns
– 12 slices of cheddar cheese
– Toppings: lettuce, tomato, pickles, onions (optional)
– Ketchup and mustard for serving
Step-by-Step Instructions
Making cheeseburger sliders is straightforward if you follow these steps:
1. Preheat Oven: Preheat your oven to 350°F (175°C).
2. Prepare Beef Mixture: In a large bowl, combine the ground beef, salt, black pepper, and Worcestershire sauce. Mix until well incorporated.
3. Shape Patties: Divide the beef mixture into 12 equal portions and shape them into small patties.
4. Cook Patties: In a skillet over medium heat, cook the patties for about 3-4 minutes on each side or until they are fully cooked.
5. Melt Cheese: Place a slice of cheddar cheese on each patty during the last minute of cooking, allowing it to melt.
6. Prepare Buns: Slice the slider buns in half and place the bottom half on a baking sheet.
7. Assemble Sliders: Place each cooked patty on the bottom half of the buns. Then, add any toppings you desire.
8. Add Top Buns: Place the top halves of the buns on the assembled sliders.
9. Bake: Place the entire baking sheet in the oven for approximately 5-10 minutes until the buns are toasted slightly.
10. Serve: Remove from the oven and serve with ketchup, mustard, and extra toppings on the side.
By following these simple steps, you’ll achieve mouth-watering cheeseburger sliders effortlessly.
How to Serve
Serving cheeseburger sliders is just as important as making them. Here are some ideas to elevate your slider experience:
1. Presentation: Arrange the sliders on a large platter for an inviting appearance.
2. Condiment Station: Set up a condiment station with various options like ketchup, mustard, mayonnaise, and barbecue sauce for guests to customize their sliders.
3. Side Dishes: Pair with classic sides like fries, potato chips, or a fresh salad to complement the meal.
4. Small Plates and Napkins: Provide small plates and napkins for easy handling and cleanliness.
5. Beverage Pairing: Offer drinks such as soda, iced tea, or beer for adults to complete the meal.
By focusing on the presentation and accompanying options, your cheeseburger sliders will stand out and impress everyone.
Additional Tips
– Use Fresh Ingredients: The better the quality of the ingredients, the tastier your cheeseburger sliders will be. Fresh ground beef and crispy vegetables make a significant difference.
– Season Generously: Don’t be afraid to add extra seasonings to the beef mixture. A dash of garlic powder or onion powder can elevate the flavor.
– Serve Immediately: For the best experience, serve sliders right after they’re assembled. This keeps the buns soft and the cheese melted.
Recipe Variation
Feel free to mix things up with these exciting variations:
1. Spicy Sliders: Add diced jalapeños or a splash of hot sauce to the beef mixture for a spicy kick.
2. BBQ Sliders: Incorporate your favorite barbecue sauce into the beef before cooking. Top with coleslaw for a unique twist.
3. Cheese Lovers’ Sliders: Experiment with different types of cheese, such as pepper jack or blue cheese, to cater to cheese enthusiasts.
Freezing and Storage
– Storage: Keep leftover sliders in an airtight container in the fridge. They can last up to 3 days without losing their taste.
– Freezing: If you need to prepare sliders in advance, you can freeze the patties separately. Wrapped tightly, they can last up to 2 months. When ready to eat, thaw and cook from frozen or reheat the cooked sliders.
Special Equipment
You don’t need much to prepare these sliders, but having the right tools can make your cooking experience smoother:
– Skillet: A heavy-bottom skillet is perfect for cooking the patties evenly.
– Baking Sheet: You’ll need a flat baking sheet for toasting the slider buns.
– Spatula: A spatula will help flip the patties and assemble the sliders easily.
Frequently Asked Questions
Can I use turkey or chicken instead of beef?
Yes, you can substitute ground turkey or chicken for beef, although the flavor profile will change. You may want to add additional spices for richness.
What toppings can I use?
The options for toppings are endless! Alongside classic options like lettuce, tomato, and pickles, consider avocado, grilled onions, or jalapeños for added flavor.
How do I ensure the sliders stay moist?
Make sure to not overcook the patties. Keeping them juicy is essential, and incorporating a bit of Worcestershire sauce, as mentioned, also helps retain moisture.
Can I prepare the patties in advance?
Absolutely! You can prepare the patties a day ahead. Store them in the refrigerator, covered with plastic wrap, until you are ready to cook.
What do I serve with cheeseburger sliders?
These sliders pair well with a variety of sides like potato wedges, onion rings, or a colorful salad to balance the flavors.
Conclusion
Cheeseburger sliders are not only simple to make but also delicious and satisfying for any occasion. Their mini size allows for a variety of flavors and endless customization, guaranteeing fun and tasty bites for everyone. Whether you are hosting a party or enjoying a casual meal at home, these sliders are sure to impress. Prepare them with your favorite ingredients, and watch as they disappear! Sharing this delightful dish with family and friends will bring joy and flavor to your gatherings.
Cheeseburger Sliders: An Incredible Ultimate Recipe

- Prep Time: 15 minutes
- Cook Time: 25 minutes
- Total Time: 40 minutes
Ingredients
– 1 pound ground beef (80/20)
– 1 teaspoon salt
– ½ teaspoon black pepper
– 1 tablespoon Worcestershire sauce
– 12 small slider buns
– 12 slices of cheddar cheese
– Toppings: lettuce, tomato, pickles, onions (optional)
– Ketchup and mustard for serving
Instructions
Making cheeseburger sliders is straightforward if you follow these steps:
1. Preheat Oven: Preheat your oven to 350°F (175°C).
2. Prepare Beef Mixture: In a large bowl, combine the ground beef, salt, black pepper, and Worcestershire sauce. Mix until well incorporated.
3. Shape Patties: Divide the beef mixture into 12 equal portions and shape them into small patties.
4. Cook Patties: In a skillet over medium heat, cook the patties for about 3-4 minutes on each side or until they are fully cooked.
5. Melt Cheese: Place a slice of cheddar cheese on each patty during the last minute of cooking, allowing it to melt.
6. Prepare Buns: Slice the slider buns in half and place the bottom half on a baking sheet.
7. Assemble Sliders: Place each cooked patty on the bottom half of the buns. Then, add any toppings you desire.
8. Add Top Buns: Place the top halves of the buns on the assembled sliders.
9. Bake: Place the entire baking sheet in the oven for approximately 5-10 minutes until the buns are toasted slightly.
10. Serve: Remove from the oven and serve with ketchup, mustard, and extra toppings on the side.
By following these simple steps, you’ll achieve mouth-watering cheeseburger sliders effortlessly.
Nutrition
- Serving Size: 12
- Calories: 250 kcal
- Fat: 15g
- Protein: 16g